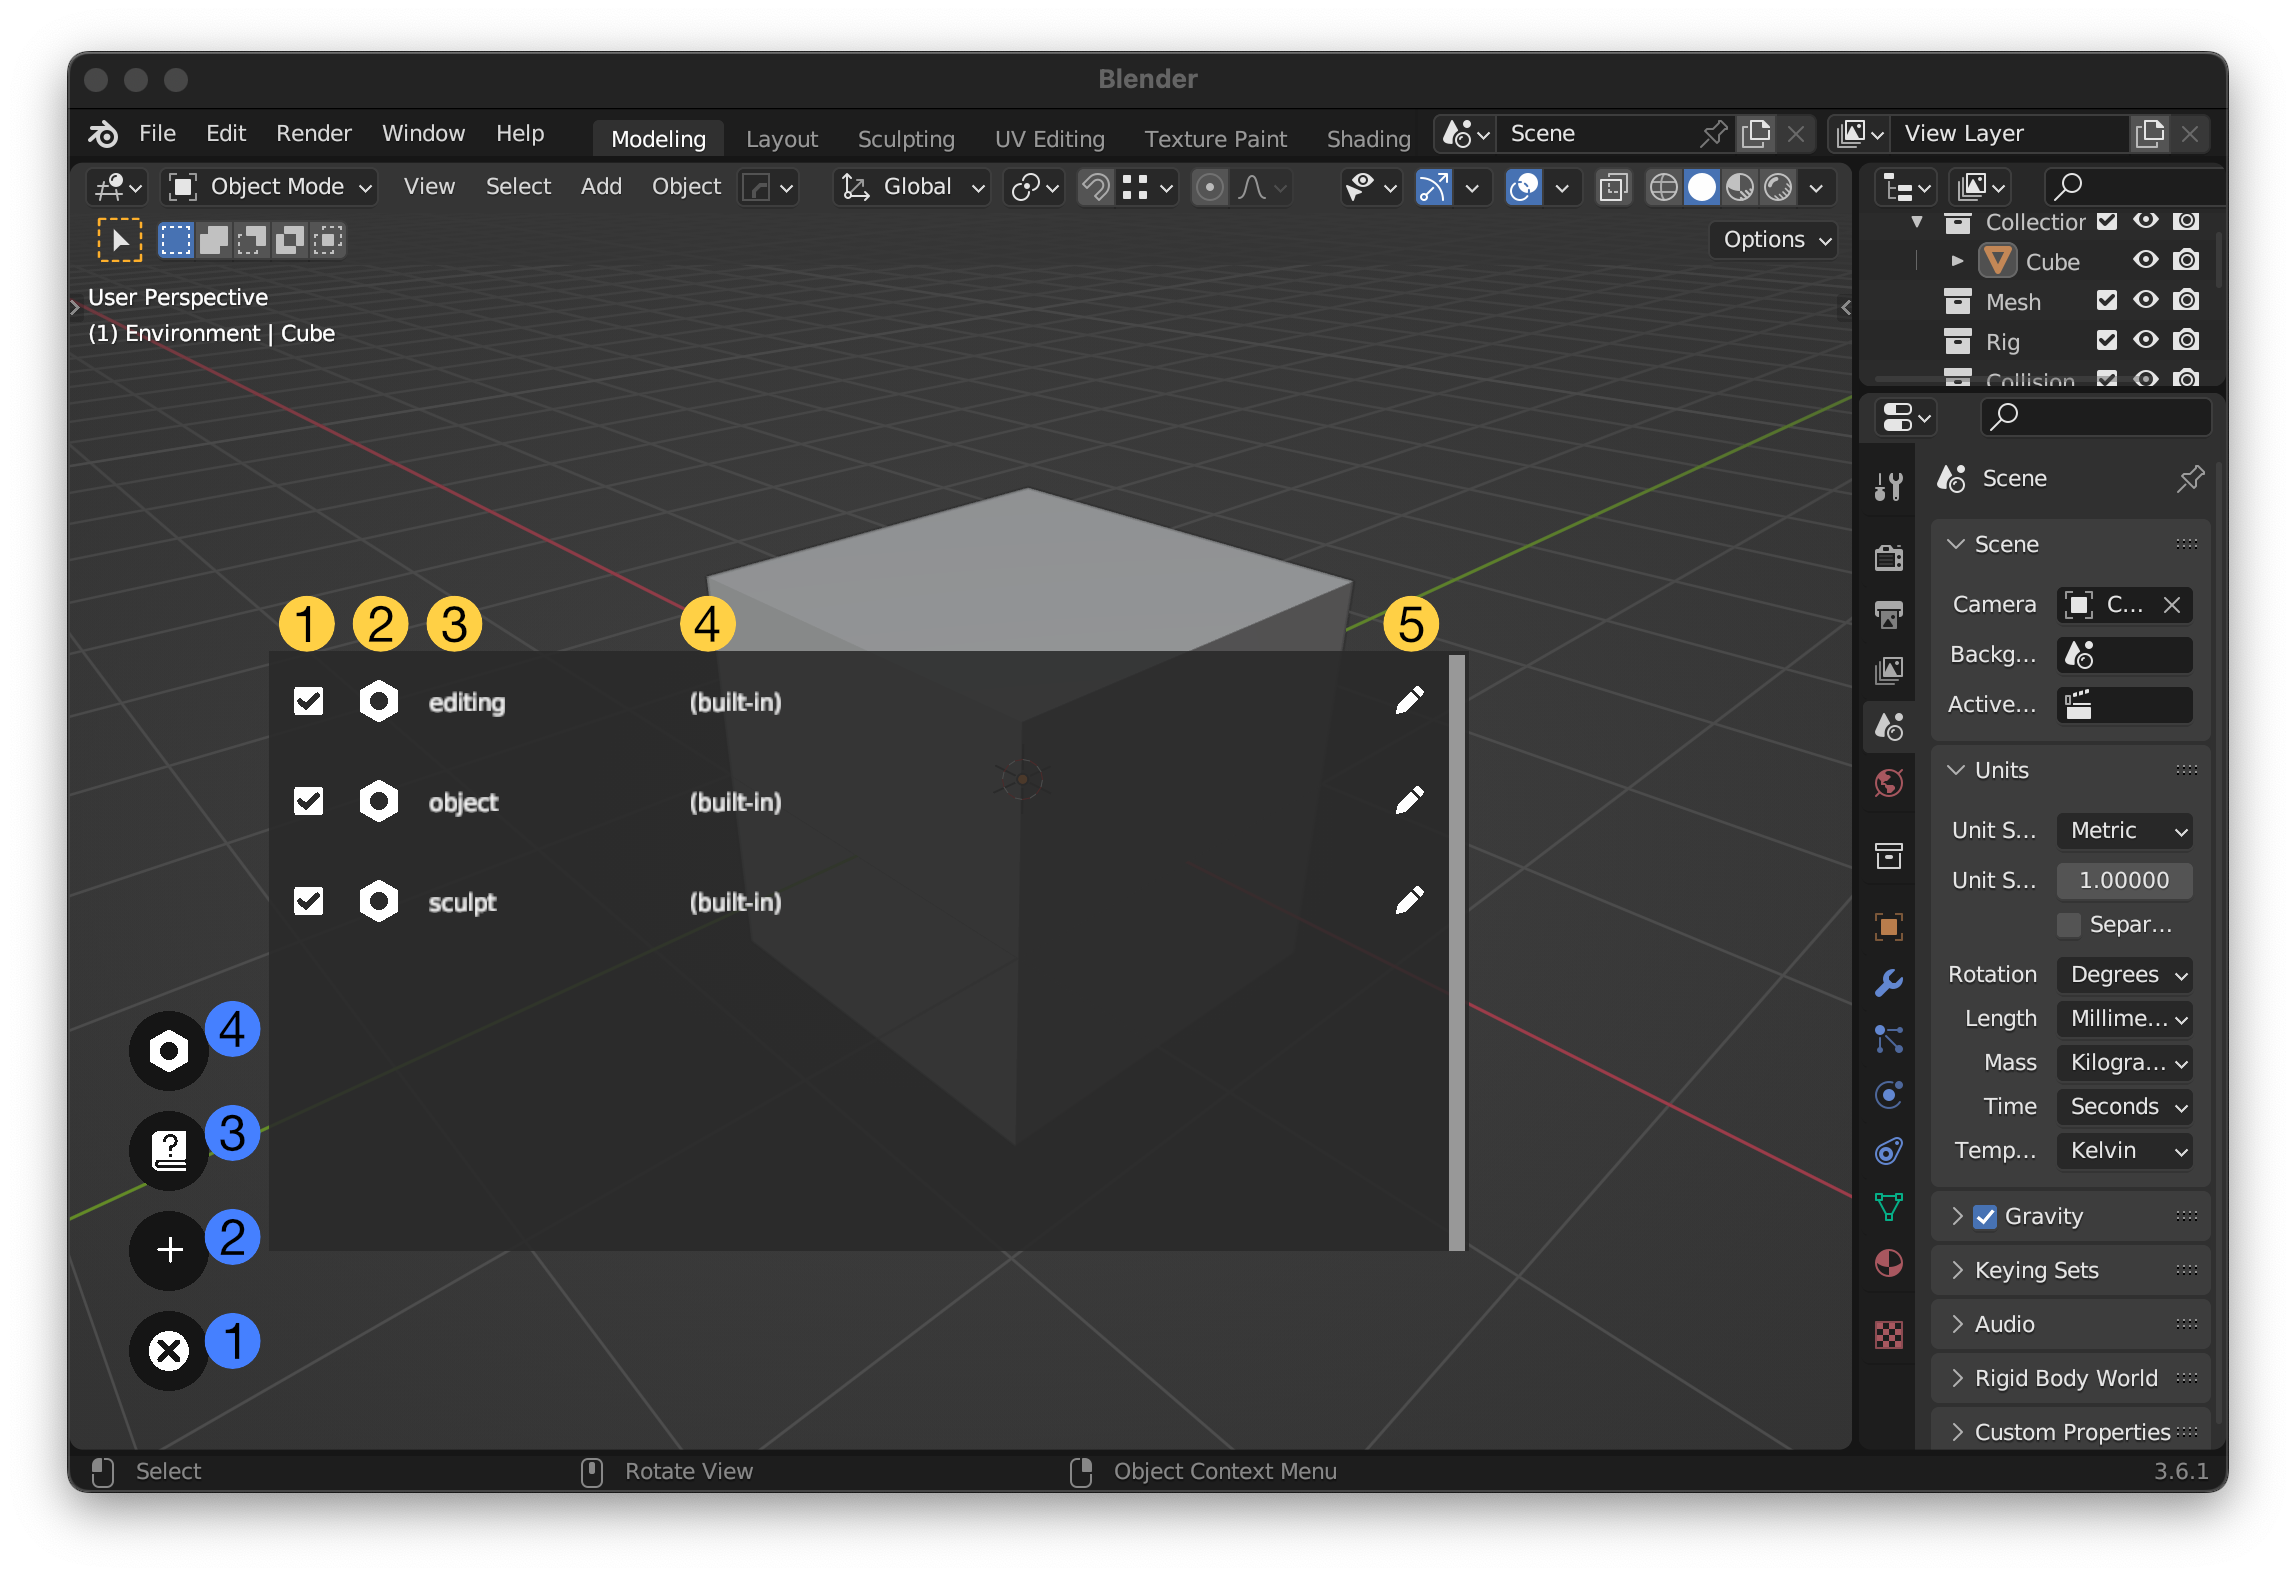
The Foam Manager is accessed using F1 by default. Beginning with Foam 0.9.0 you can change the shortcut assigned to it in content/Documentation/0.8.4/Preferences.
When you open the Foam Manager you will see a list of foams in the viewport along with a set of bubbles.
 For each foam the manager shows a line in the list with the following items (numbers in yellow across the list):
- A checkbox that allows you to enable or disable the foam.
- An icon, or space showing any special status for the foam. If the foam is a built-in, e.g. shipped with the add-on, there will be a hex nut icon here.
- The name of the foam.
- The location that the foam was found in. If you haven't defined any extra paths in Preferences, this will either be '(built-in)' for built-in foams or '(user-config)' for foams that you've created in the default user configuration location. See the content/Documentation/0.8.4/Preferences for more information on adding asset locations.
- Lastly there is a pencil icon. You can click here to go directly into the edit mode for the foam.
On the left side there are a set of bubble buttons that perform various functions. From bottom to top these do the following (numbers in blue):
- Close the Foam Manager
- Add a new foam. This opens a configuration dialog. On clicking OK you will be taken into the new foam's edit mode. See Edit Foams for more information.
- Open this page in a web browser.
- Toggle display of built-in foams that have been disabled. A built-in foam can be disabled here in the Foam Manager or because it was edited and thereby duplicated into another location. If this icon is bright white then disabled built-in foams are visible, if greyed then they are not.
To close the Foam Manager just hit ESC