The foams that come bundled with the Foam add-on are just the beginning. We want you to take control of your relationship with the Blender interface – which can be quite daunting at first. Even for seasoned users, Blender can sometimes hide interface elements that are frequently needed. Other add-ons are great at addressing particular areas and while many of them are very configurable, they do often have a learning curve of their own. Trying to remember all this is why we built Foam.
With Foam we want to give you a way to keep all the things you need right where you expect them. To do that we want you to make your own foams.
Creating a Foam
In a 3D View or other large area, press F1 to bring up the Foam manager. If you are interested in more details, take a look at Managing Foams. For now we're just going to use the Add Foam bubble to create a new user foam.
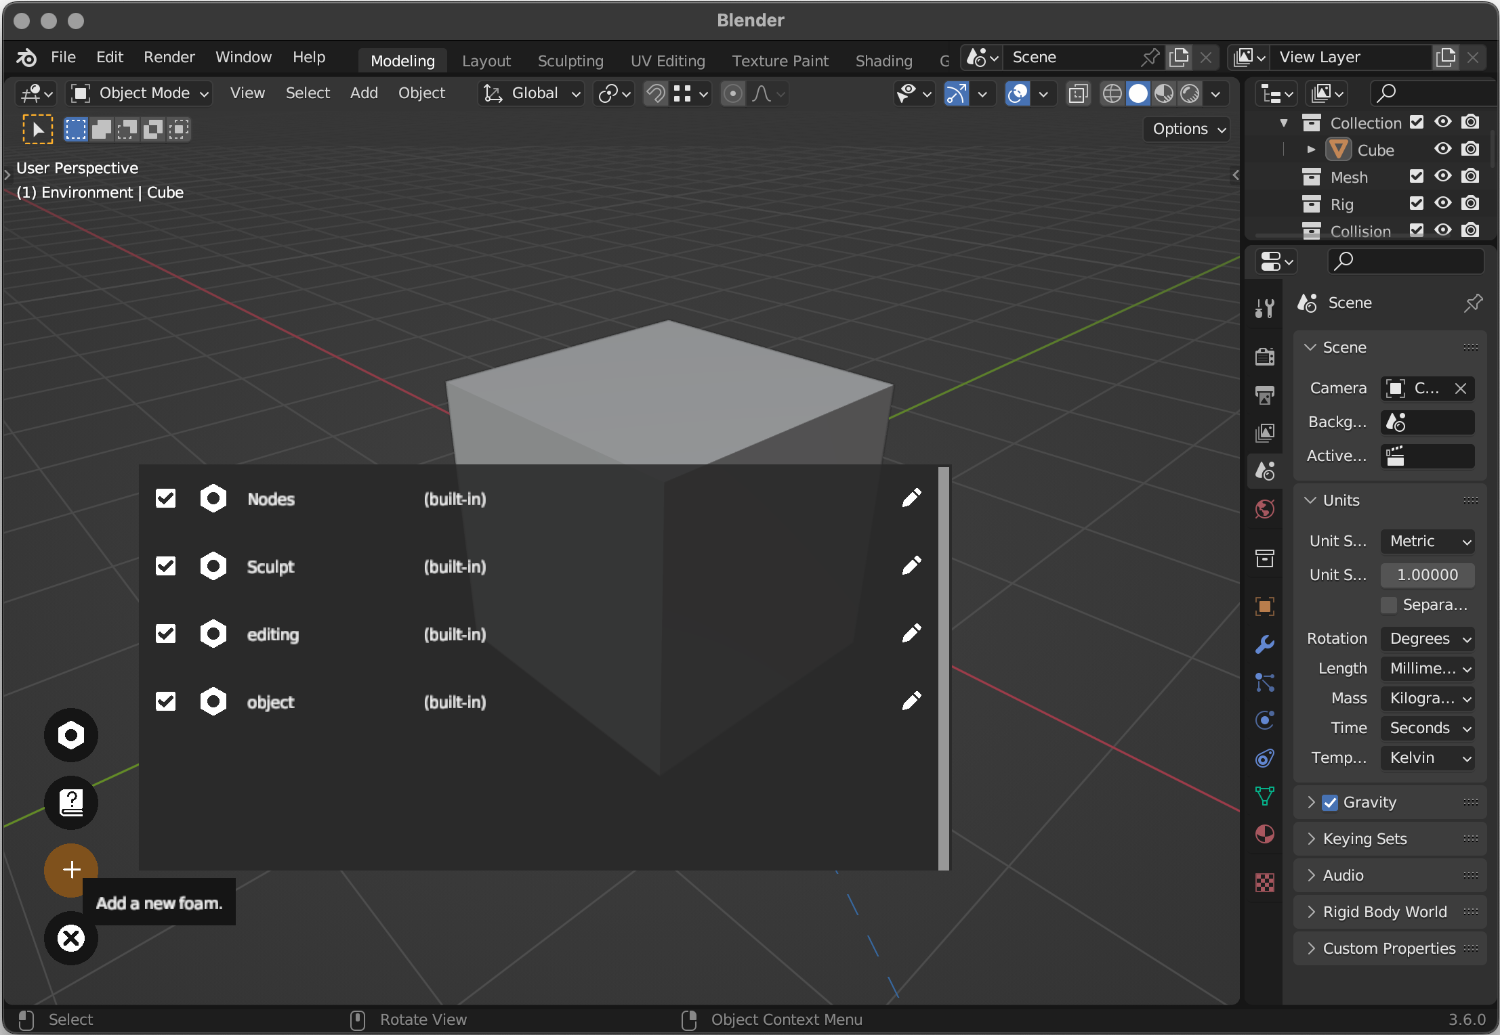
Click on the button with the + symbol in the lower left. You will see a short form to let you set up the new foam. Give it a name and set the activation key to something sensible. Blender uses a lot of the keyboard already so you may need to experiment to find one that's not already in use. For now, the F2-F12 keys are a good bet. Let's pick F3.
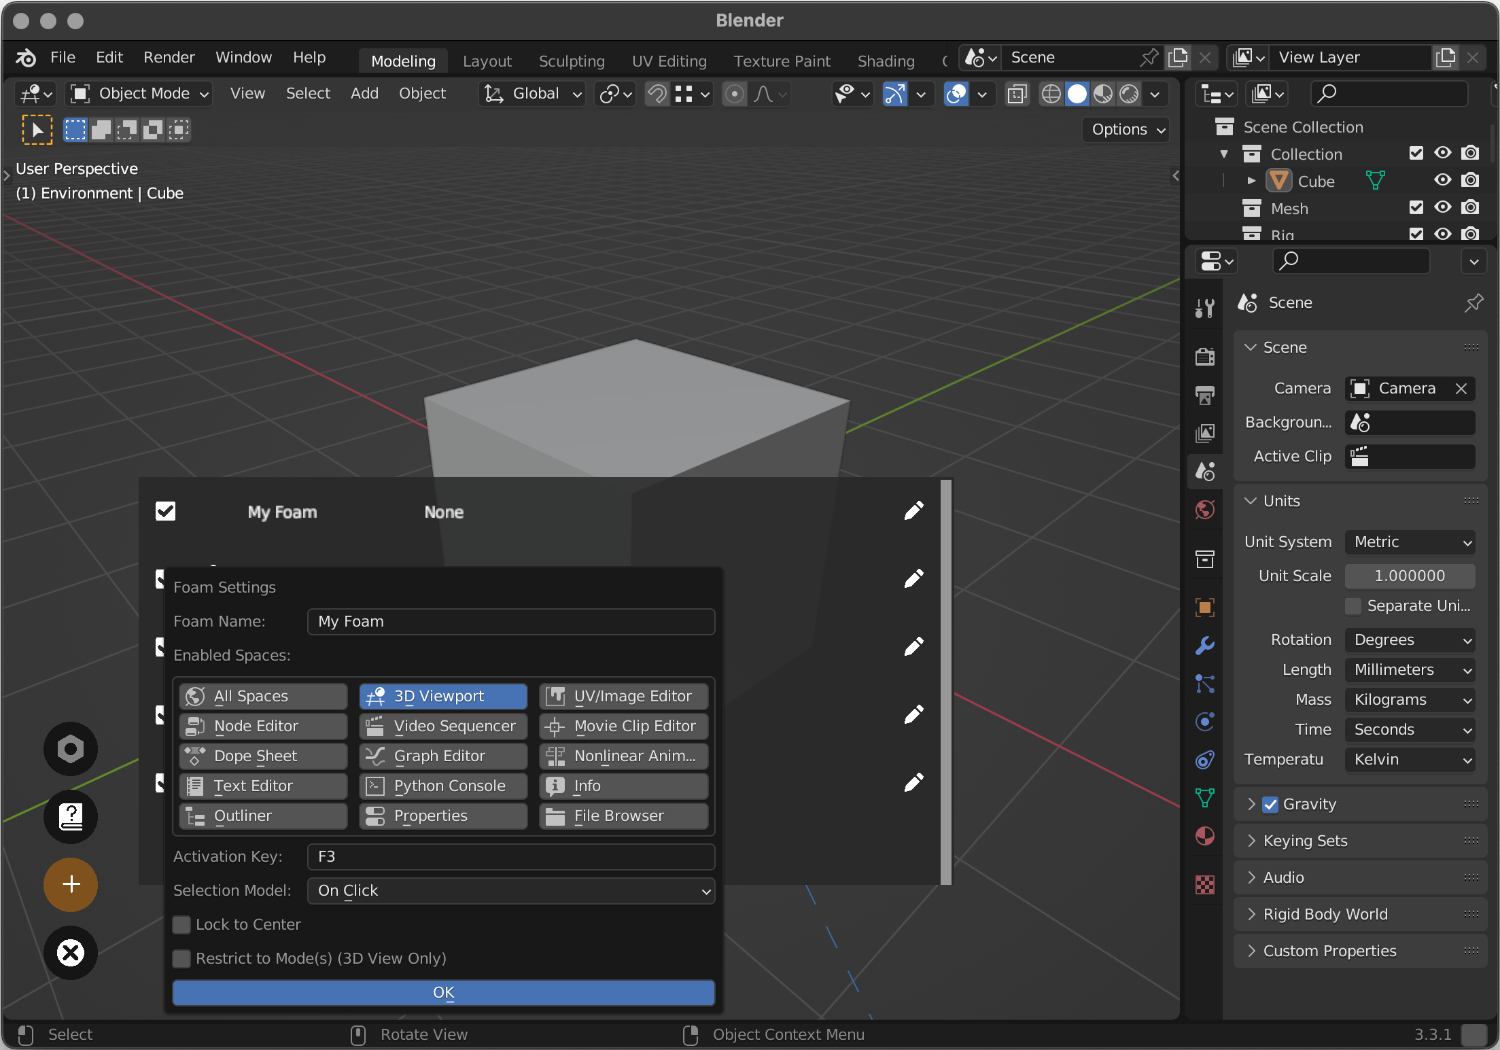
You can also choose which views or spaces the foam will appear in. Foams are most useful right now in the 3D Viewport but you can also have them show in any of the other view types listed in Enabled Spaces or choose All Spaces to have it show up everywhere. You might have a foam that lets you save the file and or start a render show up in any space.
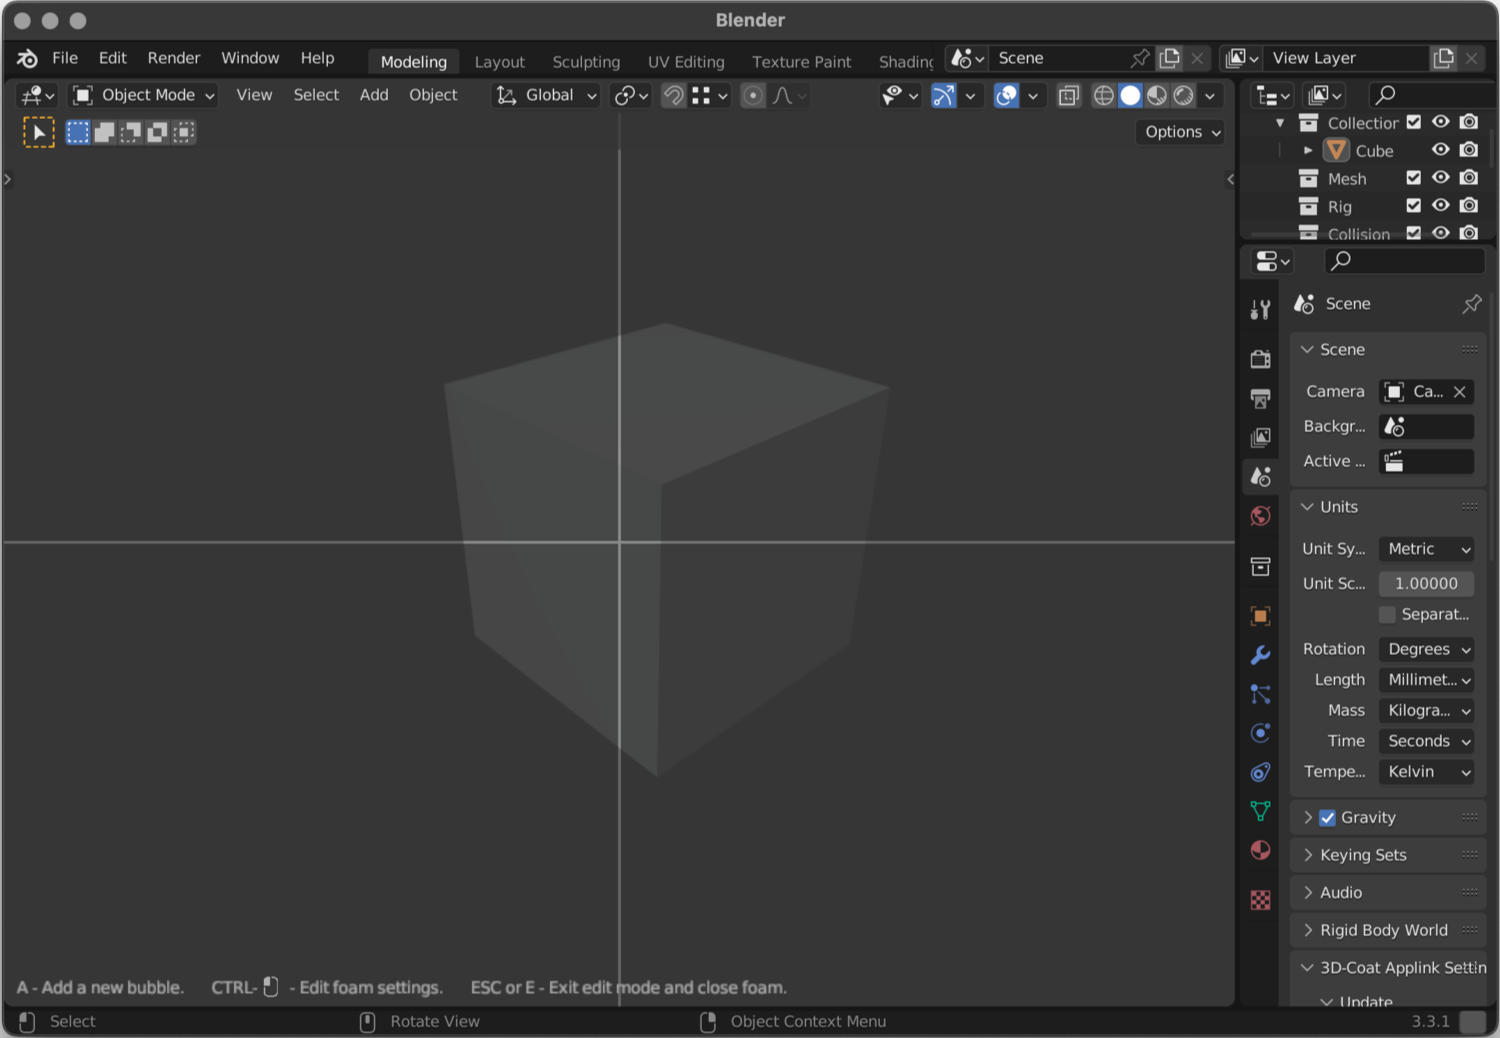
Click OK when you are ready to move on. You will see the Foam edit screen: a cross drawn in the viewport with the background faded out. The cross shows where the foam origin will be. By default, when you activate the foam (using F3 in this case) the foam will be displayed with the centre of the cross where your mouse pointer is.
Adding Bubbles
Now we need to add some bubbles, otherwise not only will the foam not do anything, it will be hard to tell that it's even working.
Notice that in the bottom left the hints tell you that you can press A to add a new bubble. Do that now. It will appear at the cursor with a default configuration that opens this web page.
To make our new bubble do something interesting, we need to edit it. To bring up the editing panel, Ctrl-Click on the new button.
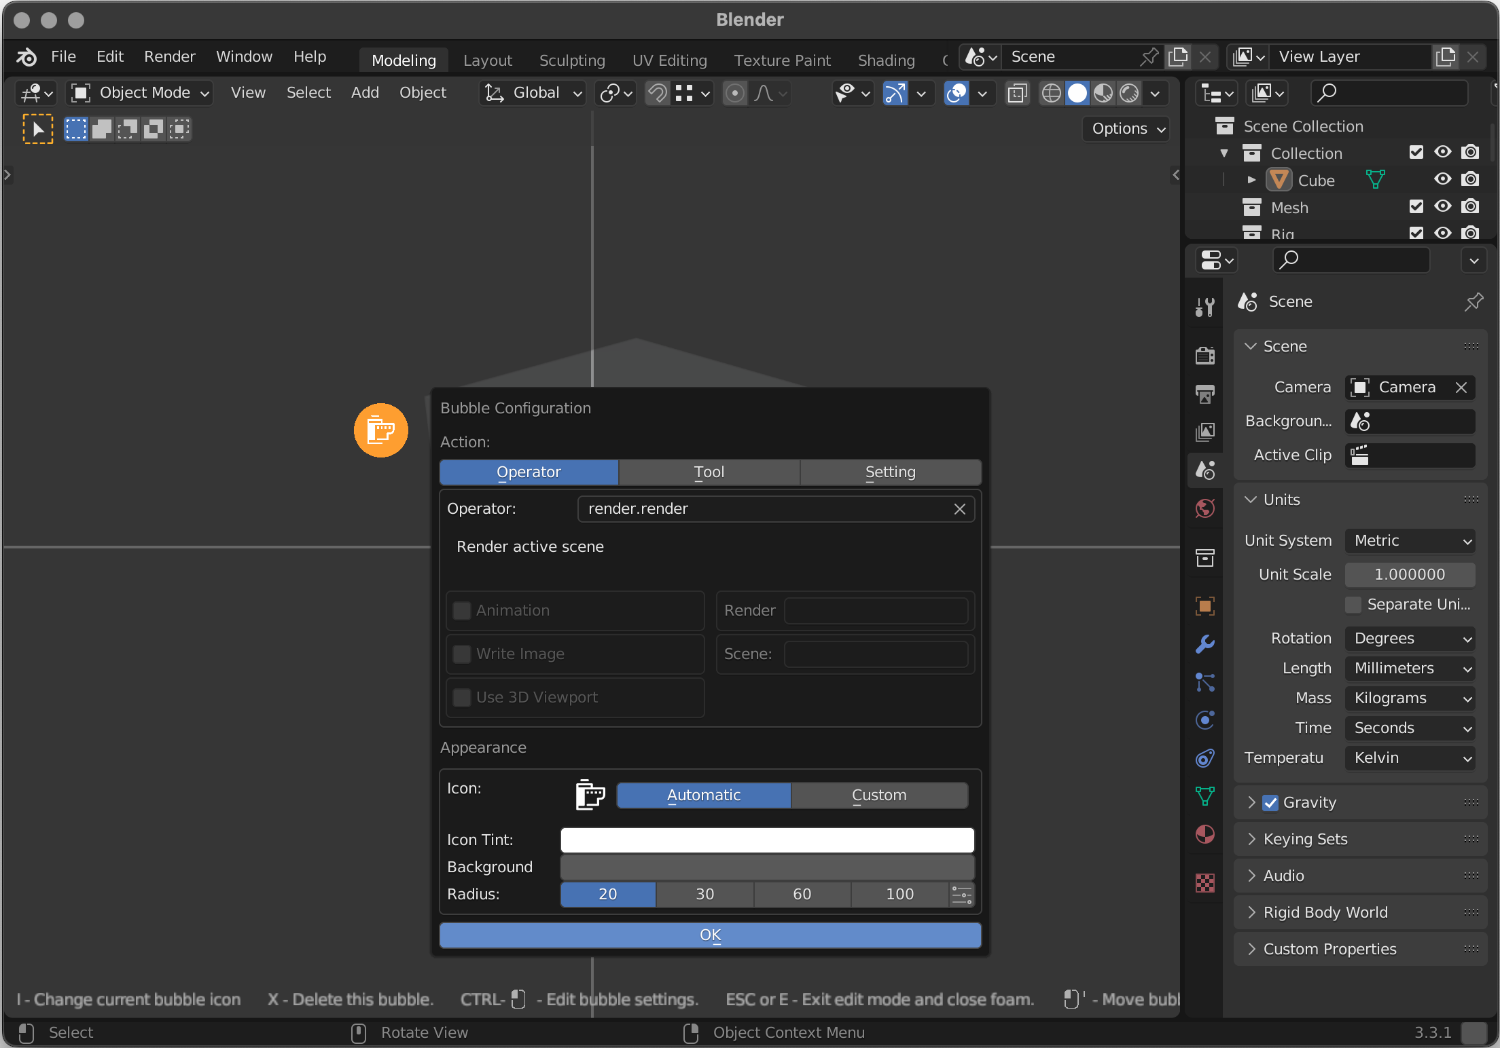
Let's make our bubble kick off a new render. First, click on the Operator button to choose an operator. Click in the operator popup, next to the word "Operator:" to open it and type "render". Select "render.render".
Under Appearance you can modify the icon and background colours and change the size of the bubble. Larger bubbles are easier to find quickly so it can be helpful to increase the size of bubbles you use a lot.
When Foam can figure out the icon to use for an action, it will show you the choice and select "Automatic". If you want to change the icon, and you know what you're looking for, you can choose "Custom" and pick from the drop down. Look at the next section to pick an icon graphically. If you decide that you always want the icon you picked to be used for this operator then you can click Make This the Default.
When you are happy with the new bubble, click OK.
You can move the bubble around by click-dragging on it. If there are other bubbles they will snap to each other where possible. Think about what actions you want to have near the pointer when you activate the foam and cluster them around the origin cross.
Icons
Blender ships with a large number of icons. We've made most of these available for use in Foam. To change the icon displayed by a bubble, type i while your curser is over the bubble in edit mode. you will see a panel with all the available icons. You can scroll through them or start typing to narrow down the search. Pick an icon by clicking on it.
![]()
Add a few more bubbles and find some operators, tools or settings for them to activate.
When you are happy, press ESC to exit edit mode. Then click the X button in the manager to close it. Your foam should activate when you press F3. If you click on the render bubble you should get a render (depending on your system and configuration you may need to wait a few seconds for Blender to set up a render before you get control back. This is normal Blender behaviour.)
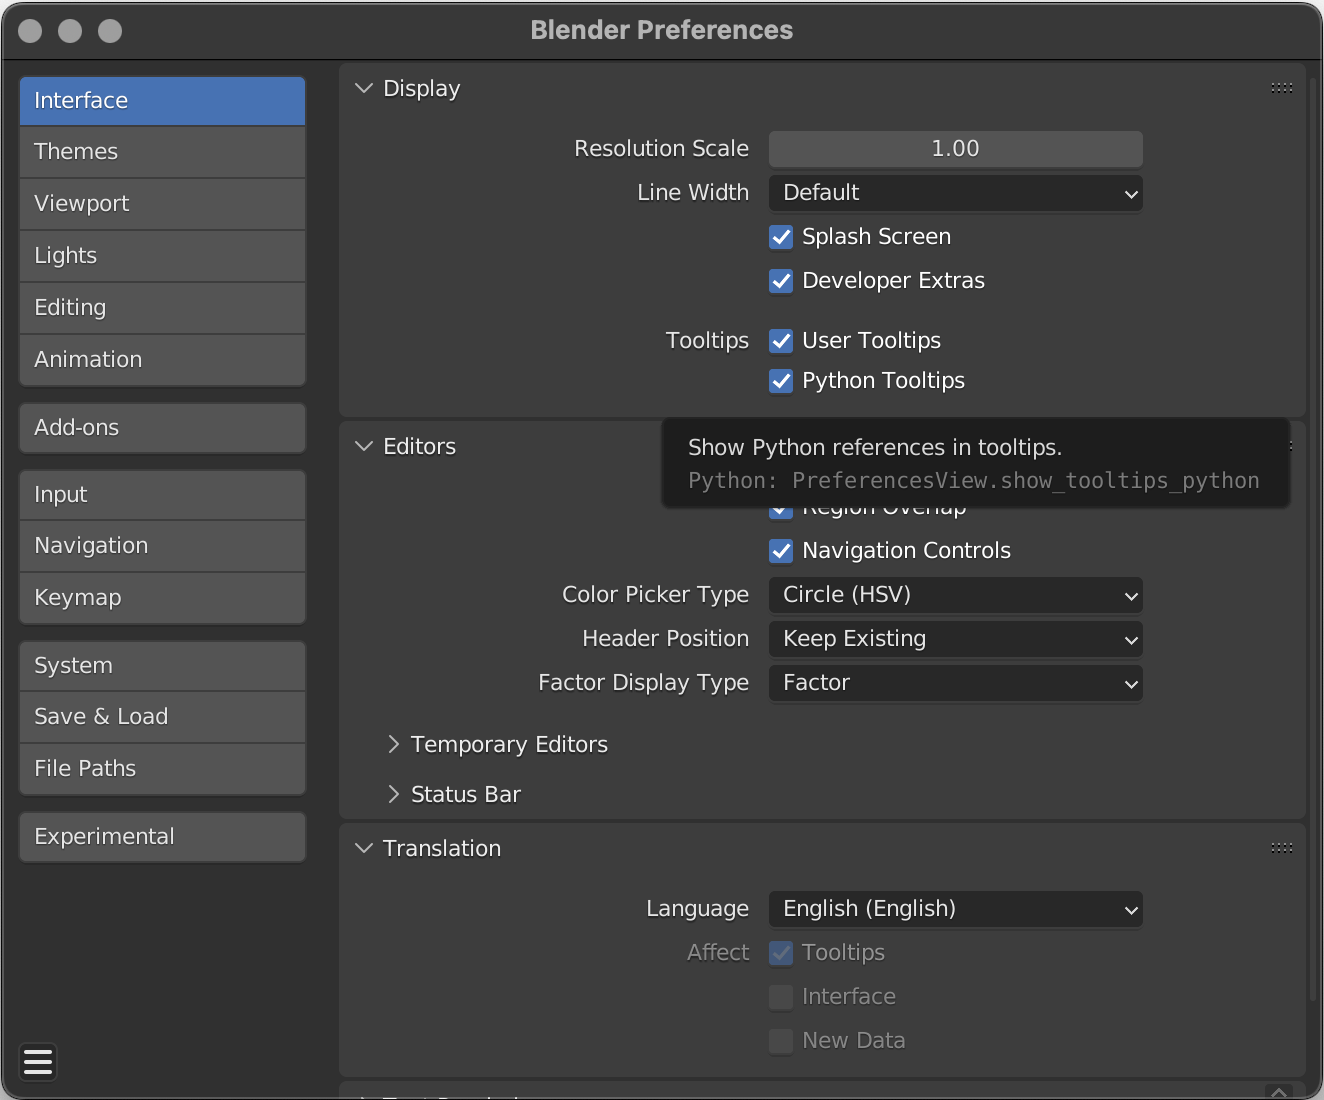
Often when you realise how easy something is in Blender you want to add new bubbles to your foams quickly while you still remember where they are. We recommend you turn on Python Tooltips in Blender preferences to make it easier to find the operators you need to set in Foam.
When you have a Foam displayed you can just hit E to go into edit mode and then A to add a new bubble. You can also access edit mode for a foam from the Foam Manager by clicking on the pencil icon next to a foam name.