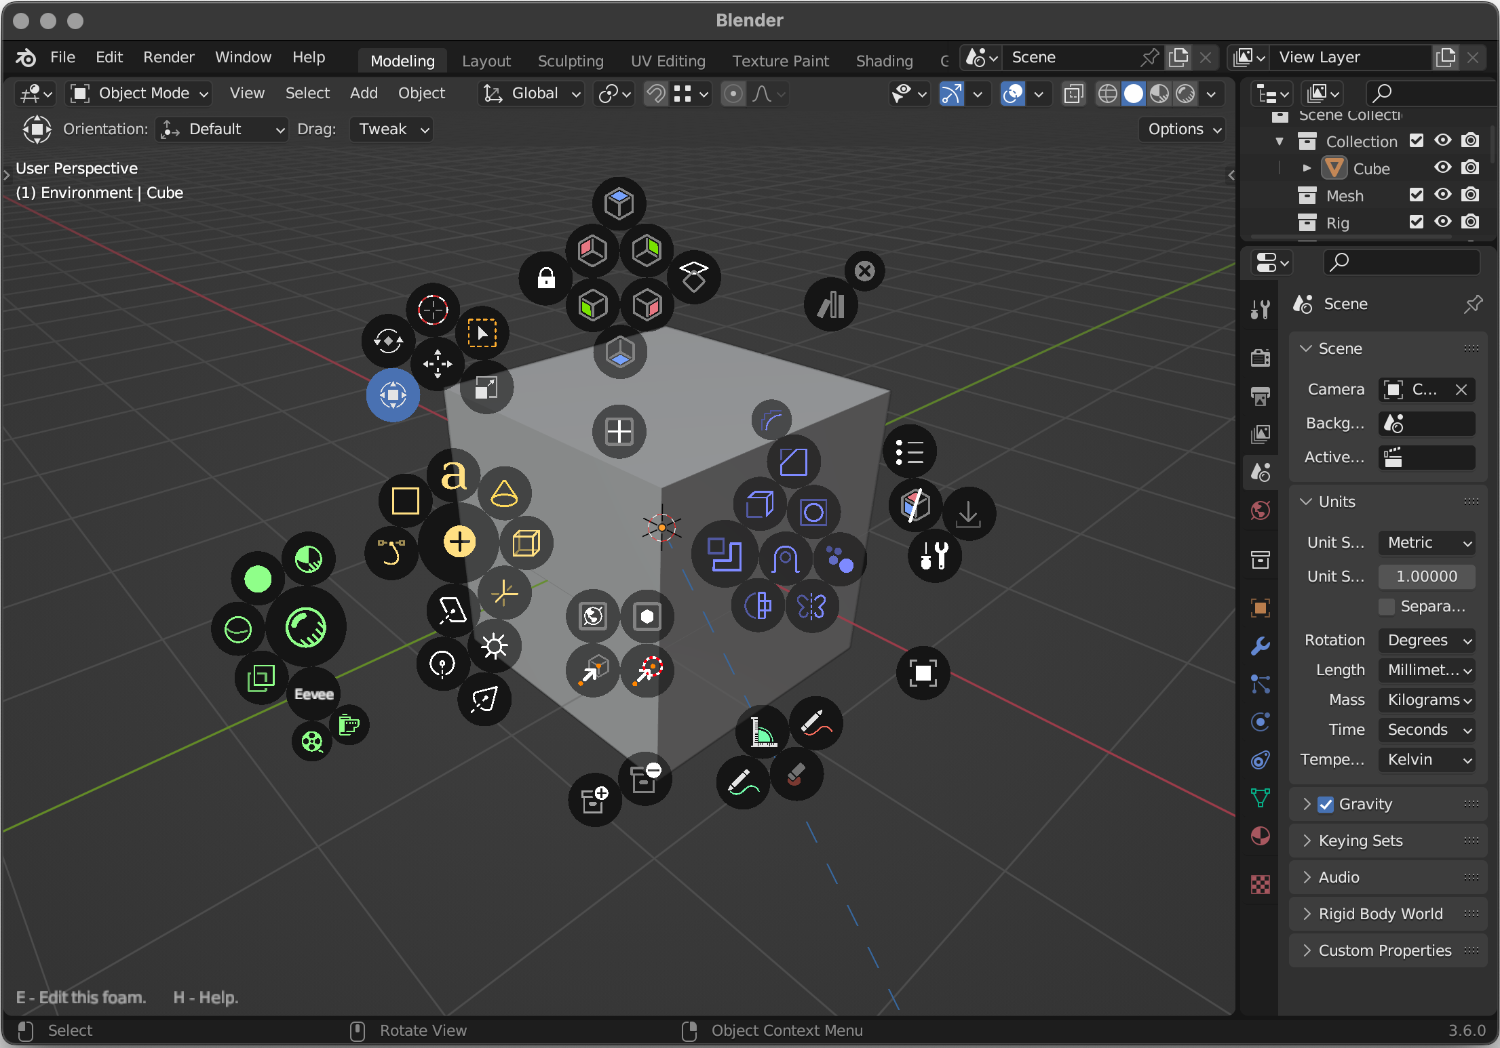
Once FOAM is Installed, we can get into using it. Foam comes with some existing interfaces - we'll call them, unsurprisingly, "foams" because of all the little bubbles. There are a number of built-in foams supplied with the add-on to get you started.
If you have a General project with the default cube in it in object mode you can press Q to bring up the object-mode foam. The foam will disappear when you release the Q key.
If you were previously using the Blender quick menu that is normally bound to the Q key and you want it back, you can disable the default foams in Managing Foams or map them to different keys by editing them.

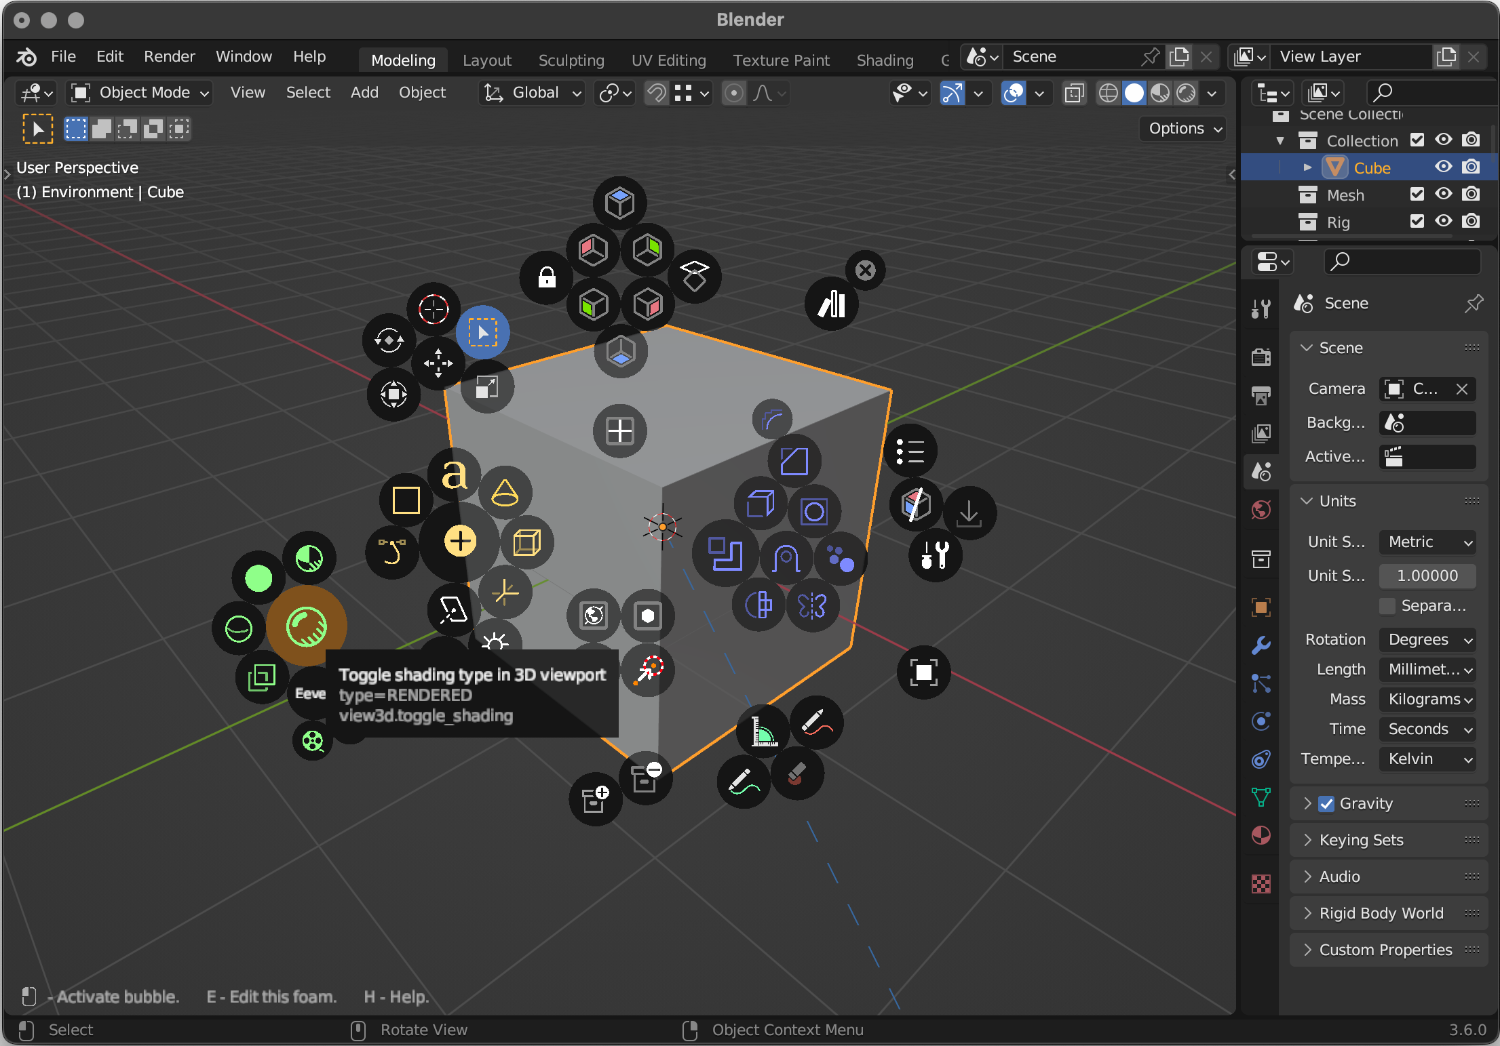
A Foam consists of a number of bubbles, each of which performs a Blender operation or toggles a setting when clicked. In this example the green bubbles on the left are all related to viewport display. Highlight the larger one and click or release Q to switch to render preview mode. Depending on your configuration Blender may take a few seconds to do this.
Notice the hint displayed in the bottom left of the 3D Viewport. Look down in that corner if you need to remember any of the key combinations that Foam uses. You can turn off hints in the Foam add-on preference panel. In the default object mode foam we've added a button that opens the Foam preferences. It's the screwdriver-and-wrench icon towards the right side.
If you hover the mouse over a bubble for a while you will see a tooltip pop up. This shows you the operator, tool or setting that the bubble will activate, along with any parameters that have been set for it. In this case the shading type has been set to RENDERED to toggle into render preview mode. If you look at the other green icons you'll see that many of them use the same operator but toggle different viewport render modes.
 The first line of the tooltip shows the documentation for the operator, the second shows any parameters that have been defined - in this case the viewport display mode should toggle Rendered mode on and off. If you have python tooltips turned on in settings you'll see a third line – showing the Operator name again as it would be needed in a python script.
Selection
Foams can be set to use one of a few types of selection.
When the selection model is set to "On Click" you need to click on a bubble to activate it. If the pointer is not over a bubble, none will be activated. When you hover over the bubble it's background will highlight in grey to indicate that it will be activated when you click.
In the other models, Foam will select a bubble based on its proximity to the pointer. The selected bubble will be highlighted in orange to indicate that it will be activated when the foam is closed. In "Nearest" selection there will always be a nearest bubble to activate but in "Radial" mode the closest bubble between the pointer and the origin will be highlighted. If there is no such bubble, none will be activated.
3D View Modes
You typically need a different set of tools in different modes in Blender. The default object foam is only available in Object mode. If you press Tab to enter Edit mode and then press Q again, you will see a different foam. When you create your own foams you can decide which modes your foam will be linked to.
When you are ready take a look at how to Edit Foams