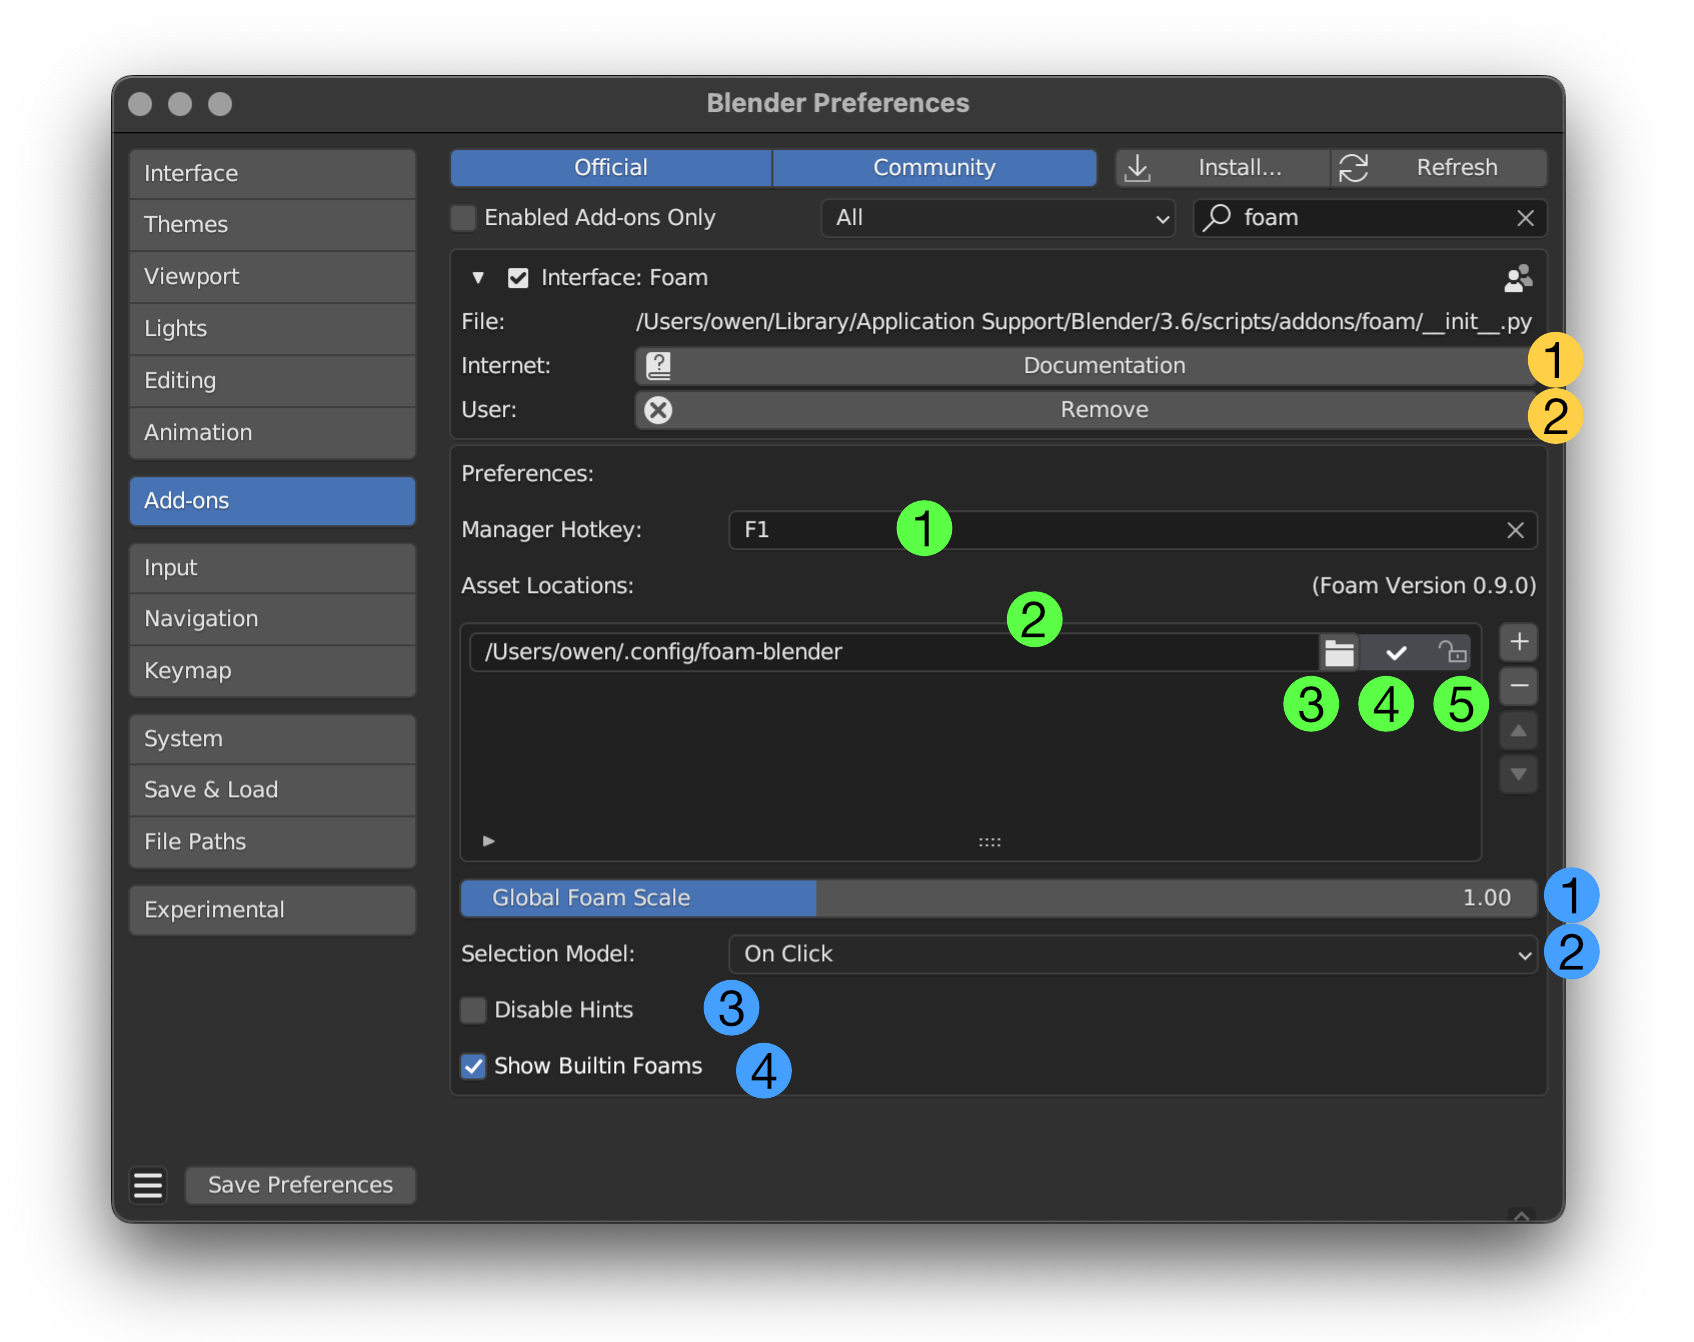
In the Foam add-on preferences panel you can manage asset locations and configure add-on behaviour. The numbered parts of the dialog are described below.

General Add-On Settings
The first part of the add-on preferences panel deals with basic properties. (Numbers in Yellow in the image above.)
Documentation - The "Internet" Button links to this documentation site.
Remove - Click to remove the Foam add-on from disk. You'll need to do this when you Upgrade. All the preferences are maintained separately by Blender so adding and enabling the new version will restore them.
Foam-specific add-on settings
Items in this area are numbered in Green in the image.
Foam Manager Activation Key
Sets the activation key that will open the Foam Manager. By default this is F1 but if that key is in use by another add-on or if you would prefer to assign it to some other function, you can change it here.
Asset Locations
Foam loads individual foams, icons and other assets from a directory structure under each file path listed under Asset Locations here. Until you add more, there should be only one path listed and it will vary depending on your operating system. This is your user configuration path.
The buttons down the right side of this area are similar to many other item lists in Blender. They let you reorder, add and remove items. Each row has the following items:
File Path - The filesystem location of the asset path.
Choose File Path - Opens a dialog for you to locate the file path.
Asset Location Status - If the path exists there will be a check mark here. Otherwise an exclamation warning triangle. Click on the triangle to try and create the path.
Lock icon - If this asset path is locked then Foam won't try to create new assets here. When you create a new foam or modify a built-in foam, the add-on will create a new asset in the first path that is unlocked and that it can write to.
Other Settings
These settings cover other miscellaneous options. They are marked in Blue in the image
Global Foam Scale - Since 0.9.0 Foam respects the global interface scale in Preferences->Interface->Display->Resolution Scale. The Global Scale setting here in Foam preferences allows you to adjust the Foam drawing scale relative to the rest of the interface if you find foam too big or too small at your preferred resolution scale.
Selection Model - When a foam is open and not in edit mode there are three selection modes that Foam uses to determine when to highlight and activate a bubble. This preference sets the default mode for all foams that don't specify one of their own.
- On Click - Bubbles are highlighted only when the mouse is inside them. You have to click on the bubble to activate it.
- Nearest - Bubbles are highlighted if they are closer to the pointer than any other bubble. If you close the foam by releasing the activation key the highlighted bubble is activated.
- Radial - Bubbles are highlighted if they are closest to the pointer on the ray from the origin to the pointer. Bubbles further from the origin are not highlighted. If you close the foam by releasing the activation key, the highlighted bubble is activated.
Disable Hints - By default whenever a foam is active you will see context-sensitive hints at the bottom of the view. You can disable hints if you don't need them and turn them back on if you forget something.
Show Built-in Foams - If this is checked then the Foam Manager will show built-in foams that have been disabled. Otherwise they will be hidden. This is the same as clicking the hex nut bubble in the Foam Manager